Category Archives: Lighting

Portrait lights on a budget

So what is the minimum you can get away with in terms of flash light for a head shot?  I’ve had this question a few times over the last month or so and I’ve put together a list of kit you can take great portraits with for almost no money*

So what do you need?  A light, some way of triggering it, something to hold it, maybe some way of softening the light and maybe a reflector to fill in shadows.  Now – you can get away with *buying* just the light and a trigger or cable.  All of the rest you can make, however I am going to recommend you buy things – as to be honest they are not expensive.

Continue reading

Portrait shooting and processing workshop

Thanks to everyone who attended the session last night at Holmes Chapel Camera Club.  Despite the technical problems with tethering a D800 to a Windows 8 laptop (my old D700 always worked flawlessly when tethered) we achieved the main goals of the workshop.  There are a number of articles on this website looking at specific bits of process and techniques which I’ve linked to on this page, however I thought it would be useful to summarise the things we looked at last night.

Many thanks to Clara for modelling for me.  Not easy seeing your face up that close.

Continue reading

Focus On Imaging

Made the annual pilgrimage to the NEC last Sunday.  Very quiet:  there was no queue on he M42, no queue to get into the car park either, and room to actually walk between the stands.  Quite a few big names missing.  Jacobs of course, who went to the wall last year.  Some new faces including Hasselblad and many familiar faces.  Was good to see Garry Edwardes on the Lencarta stand and their amazing new SF300 and SF600 high-speed IGBT based lights (basically big mains powered speedlights) with mind boggling 0.8 second recycle times at full power, and 1/20,000th of a second flash duration at minimum power on the SF300.  I’ll be buying one of those as soon as they come into stock in the next few weeks.

Frank Doorhof was on The Flash Centre stand demonstrating his approach to lighting and getting some amazing pictures with Maisy.  Here he is, having just blown Maisy away with the new point-and-destroy feature on the Sony Alpha 99…..

 Kabooooom!


It as great to talk to Frank after the show – I learnt the basics of how to light and meter from Frank’s videos on Kelby Training.

Did a bit of shopping:  bought a Lumiquest LTP softbox.  I like the Lumiquest design as it folds flat in seconds and fits in my camera bag.  I have also ordered a similar looking one from Hong Kong via eBay for £4.65 inc postage.  It’s rude not to at that price and I’m curious to see how they stack up as the Lumiquest one is £45.  Also bought a 1.2m Octobox from Bessel – with a difference.  I’ve already got a 1.2m Octa, however it takes a twenty minute wrestling match to put it up.  This new one, opens like an umbrella, and took me less than 2 minutes to construct, and 40 seconds to take down again, including attaching both diffusers and the grid.  Marvelous.  added to my clamp collection whilst at Bessel as well – can never have enough speedlight clamps, poles, and other light holding gear.

Images from the lighting workshop

Here are some of the things we went through in the workshop last month.  There was a lot of content to cover which meant restricting the amount of sets and lighting styles to cover each one in depth.  Our model for the day, Vicky provided all the outfits whilst hair and makeup was done by studio owner  Becky Hampson.   We started off with a simple beauty shot to talk about setting up 3 lights one at a time, starting with the key, using the light-meter to get the others at the exact ratio we wanted.  The background is provided by a 1.2 metre octabox, facing the camera and back-lighting the model.  Fill is provided by a strip box from below, and the key light is a diffused beauty dish.  This is a pretty formulaic and easily repeatable setup – it’s a bit like building your own Photo-Me! booth for beauty shots: once it’s set up and the lights are dialled in, you can just blast away.  There are lots of variations on this using reflectors instead of a second softbox for fill or with a Tri-Flector, or with a front-lit background and so on.  I like this set-up as the background light washes over the edges of the model – you just need to be careful not to crank up the background light too much or the light will eat into the edges of the hair and other fine detail.  You can meter this to get started, however this is really a creative decision – I tend to start at 2 stops over the key light, with the octabox about a foot behind the model. Continue reading

Lighting Workshops in partnership with Body Couture Studios

Lighting workshop flyer

I am very excited to be  teaching a workshop on lighting at Body Couture Studios on the 26th January.  The workshop will cover some of the underlying science, a tour of the typical equipment used, and then move on to practical sessions covering how to meter the light, where to place the lights to get hard or soft light, how to adjust the position to balance the lighting on certain features of the subject, how to skim and feather the light and how various modifiers can be used to help achieve these goals.  These will be part demonstration and part hands-on for the attendees.

Finally, we’ll be looking at how to incorporate motion into your shots combining continuous and flash light for a classical dance shot.

The course is suitable for anyone who has never used flash before and wants a jump-start into the world of creative lighting, and people who are familiar with studio lighting and would like to take the next step in controlling the light to get the picture they have in their heads, onto the memory card.

The course is for a half-day on the morning of Saturday the 26th Jan (10am start) At Body Couture Studios in Congleton, Cheshire.  The cost is just £95 and you can book your place by calling Becky at Body Couture Studios on 0772 039 5723.  You can find out more about the studio at http://www.bodycouturestudios.co.uk


Five Point Palm Exploding Heart Technique


Dancer: Gabrielle Dams Crew: Suzy Clifford, Chris Steel, Lorraine Barnard, Clara Barnard. Time lapse BTS shoot: Clara Barnard Theatre technician: Paul Edwards Make-up: Gabrielle Dams Model Ageny: Becky Hampson, Body Couture Location: Grange Theatre, Hartford Special thanks to The Grange School.

Ever since I watched Joe McNally’s video about making a stroboscopic shot of ballet dancer Jen Concepcion, I wanted to shoot more dance.  Moreover I couldn’t get that shot out of my head.  I’ve learnt a lot of from Joe’s books and videos over the past year or so, and never travel without at least 1 speed-light these days (those rumours about me sleeping with an SB900 under the pillow are unfounded though).  Of all the shots I’ve watched Joe set up and make, this had to be the most complex in terms of technical lighting.  Not in terms of lighting finesse you understand – there are much more subtle arrangements of lights in Joe’s work.  But, shot in 3 parts, in camera with 3 commanders and for sheer speed-lightery, this was the Five Point Palm Exploding Heart Technique of lighting – and as time went by, I just had to try it to get it out of my head…. Continue reading

Scooter make fashion shot

With wrinkled background

Or “early man” fashion shots really. These are pretty basic in terms of creative input, however I wanted to give the basics a go in terms of more even, full length lighting, and getting the background right!  It sounds simple doesn’t it:  just blur the background to even out the inevitable wrinkles in your seamless paper or vinyl?  I tried a number of ways of doing this:  brushing on -100 clarity in Lightroom with the adjustment brush using the “auto mask” feature.  I tried feathering the brush, not feathering the brush; cleaning the edges after with the eraser.  I got close, however at 100%, there was always a perceptible halo round the model.  I tried blurring in Photoshop and masking the model by brushing the mask on; and a 100 variations.

Then I watched Frank Doorhof’s video on how he processes his fashion shots – ( On Kelby Training – go there now!  You’ll like it ).  I’d watched Frank’s great lighting videos, but never his Photoshop ones as, well, they have Matt Kosklowski’s tutorials on there – why would I watch Photoshop tips from Frank ? He’s the lighting guy!)  However, Frank’s technique for blurring out the background really works, and it’s not even that tedious to do!

In a nutshell:   Duplicate the image; on the duplicate layer, select the background using the tool of your choice (I used the magic wand).

with smoothed background

Keep clicking until most of the background is selected, but don’t pay any attention to small areas caused by loops of hair and don’t worry about getting the selection perfect.   Invert the selection.  Expand the selection by 1-2 pixels so now you have a  rough selection of your model with a small margin around them.  Cut out the selection (your model).  You can still see the model from the layer below.  Blur the duplicate layer at maximum Gaussian blur.  Get rid of the banding this produces by adding the same amount of noise to this layer as your camera produces  (for my Nikon D800E, this is around 1% at ISO 100).

 a tighter head and shoulders shot processed the same way

Paste the model back.  This produces a 3rd layer:  merge down.   Now zoom in to 100% and click the duplicate layer on and off and marvel at the seamless join.  You can then mask off the blurred layer to suit, say on shadows cast on the floor or for any fine tuning around the hair etc.  Full size in the People gallery as usual.

Apart from that, these shots used a 1.2metre white octabox, with both baffles in place up high to camera left, and a gridded strip box pretty much opposite the octa to camera right and behind the model.  The background is a grey seamless vinyl, not specifically lit.


Model:  Ellie Anderson – Body Couture Agency.  Clothes and make-up by Ellie.


Hoops, poles and portable lights


I visited the opening party for Body Couture studios in Congleton last weekend.  It’s a fantastic Georgian building with a great gallery staircase, small studio rooms and some other rooms with attractive furniture, and big windows.  One of the studio rooms is equipped with 4 poles and a hoop.  The studio is owned and operated by Becky Hampson, a successful model, and pole fitness instructor.

I had no idea what to expect from this event other than to meet people.  At the last minute I threw a speedlight and a 24″ soft-box and stand into the car.

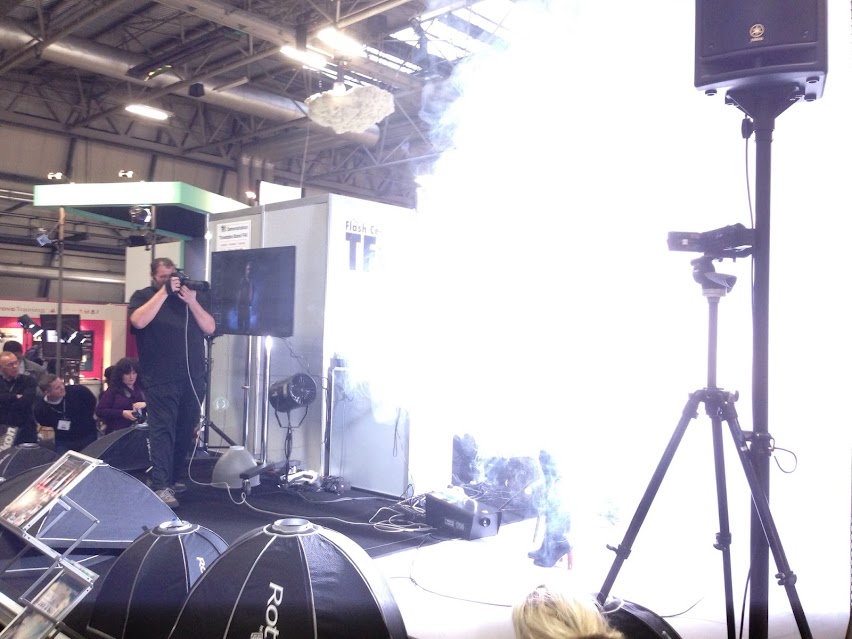
The event was packed with photographers, models, and makeup generating a great busy atmosphere.  Whilst the studio has some basic lights, and people were shooting, the outcomes were likely to be on the basic side.  Chris and I started shooting models on the hoop – using an SB-900, zoomed out to 17mm with the diffuser attached, and  inside the 24″ soft box.  The room is quite small, and there were a couple of other people in it so we struggled to get distance both for the light and the camera.  So I decided to stick to some tighter shots, minimising the background.

At 1/250th, ISO 100 and f/5.6  on the D800E the room was black and ready for light.  Chris was wielding the light handheld – the only way to go when your model is moving around, hanging upside down and rotating on a hoop suspended from a floor joist in the ceiling.  After a few shots we swapped roles and I played “chase the face” with the light for Chris as Belle, a dancer and part time model, moved from pose to pose.


Using iTTL to control the light from the camera was perfect for this ever changing shot – we could move the light, feather it, move it further away, closer in and iTTL sorted the exposure every time.  Later on, we worked with Stacey (left) and the one-

light in a soft-box (here to camera right, angled slightly downwards, and more or less side-on) worked well.  Chris varied the dtsiance of the light until we got a nice rotation from light to shadow.  I would have killed for a 2nd light to add some accent to Stacey’s hair, however we had just one light – and I like the simplicity of this shot.  The quality of the light was quite soft too, for a relatively small source compared to big studio octa-banks.

We also used the same technique to light some shots at the top of the stairs with Ellie.  Not the last word in lighting, however better than just the ambient which had the models in shadow against a lit background.

I had a fantastic time, met a load of talented people and even made a few simple images  The studio is a little on the small side however if you’re looking for something with a bit more atmosphere than seamless paper, Becky’s new studio venture is worth a look.