This is another of those concepts I keep seeing presented in videos. Videos by respected and knowledgeable photographers and re-touchers, who otherwise demonstrate a complete and thorough understanding of the concepts they are explaining. For some reason though, they often have a blind spot when it comes to this one. It’s one of those where for most images it probably doesn’t matter too much if you don’t understand what is truly happening however it makes my eyes twitch (in a sort of Herbert Lom in the Pink Panther sort of way) whenever I hear this being said, so here’s my $0.5 worth on the subject 🙂
It concerns making adjustments to colour in an image usually using the curves adjustment tool (but is true of any tool that changes the brightness levels of individual colour channels). I’m going to demonstrate using curves. The claim, is that by lowering the contribution of one colour channel you increase the contribution of the opposite colour channel. The curves tool in Photoshop allows for adjustment of the Red, Green and Blue (RGB) channels separately and for all three together (for an overall adjustment in brightness). This leads to questions about adjusting other colours such as Yellow. Red, Green and Blue are the opposites of Cyan, Magenta and Yellow: RGB is the opposite of CMY, and C, M and Y are made from mixing R, G and B. This is all good, however every explanation I’ve seen online then goes off the rails. Let’s take Yellow as the target colour channel you need to increase. There is no Yellow colour channel in the curves tool (or levels etc). All the tutorials I’ve watched on colour tell you to do this by reducing blue. This will not work, and here’s why:-
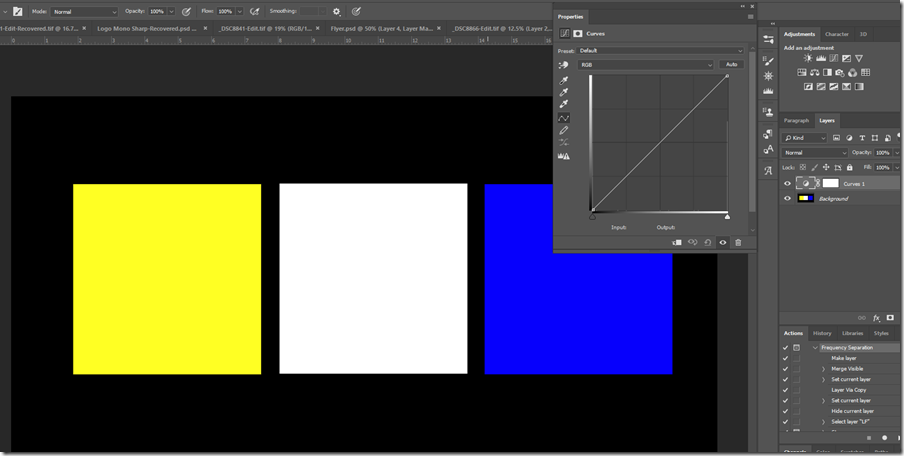
Here’s the test bed we’ll be using to explore this: I have a black background (so no brightness at all in either red, green or blue). We have a Yellow patch, a white one and a blue one. I’m going to use a curves adjustment to increase or decrease the contribution of each colour channel and in this control image you can see it’s completely linear in all channels (and so having no effect).
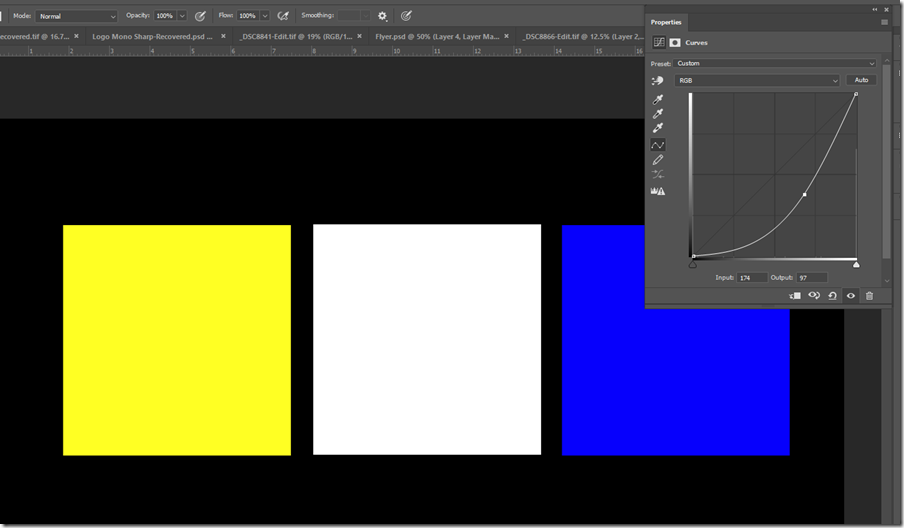
It’s important to understand exactly what the curves tool represents. In each channel, you can affect the luminosity of that channel. The X axis represents luminosity levels for the selected channel in the image (or overall luminosity for the combined channel) from black (left) to maximum luminosity for the channel on the right (pure Red, Green, Blue or White for the combined channel). There is a histogram (count of each level of brightness) in the background of the curves panel. As I only have black, and maxed out colour swatches in the test image, the histogram is very simple, with just a single line at far left for the black pixels and another at the far right for the maxed out pure colour channels. Pulling the curve about anywhere other than at the far right or far left will have no effect on this image:-
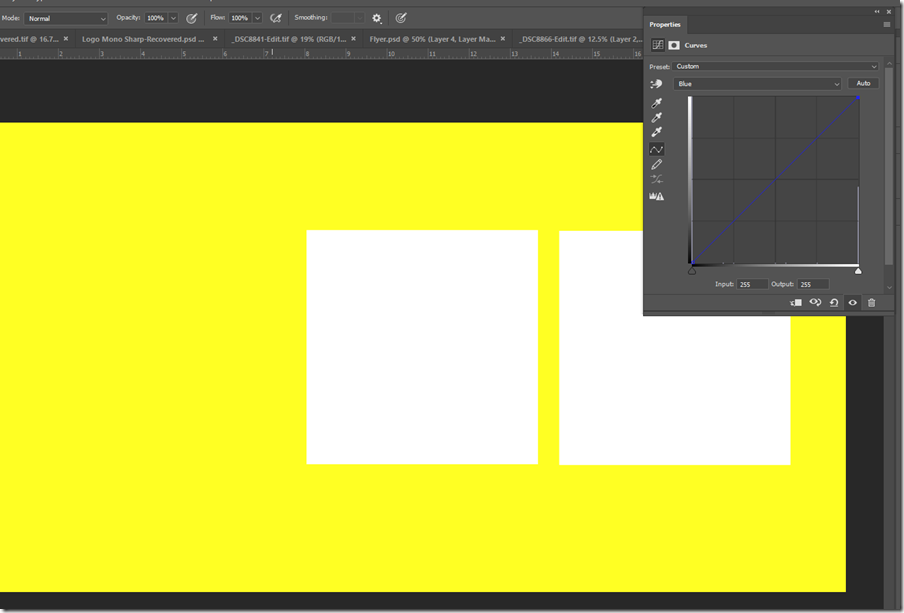
So let’s dial the blue all the way down to zero by pulling the blue channel all the ay down on the far right. To do this you need to drag the point that it already on the curve on the top right after changing the channel from RGB to Blue:-
So lets examine what’s gone on here. The yellow swatch is unchanged. It had no blue in it, so reducing the blue channel made no difference. The blue swatch, became black, as we took out all of the blue and there was nothing else in there to begin with. Now the white swatch became yellow. This not because yellow was added – all we did was remove the blue. It’s yellow because of what is left in the swatch. In this case Red and Green are left and unchanged, and together Red and Green produce Yellow. The blue swatch didn’t mysteriously turn yellow by removing the blue, and neither did the black surround. Removing one colour channel will not magically add the opposite. Removing blue from your image using curves may make it appear more yellow, but that yellow (Red + Green) has to be there to begin with (as in the white swatch in the test image – white contains all colours of light). You can’t add it by removing blue.
So how do we add yellow? Pretty simple really we just add the colours that make yellow: Red and Green:-
I’ve reset the blue channel, and then maxed out both the Red and Green channels by dragging the point at bottom left all the way up to top left in both channels. Let’s look at what happened: The Yellow swatch is still yellow (no surprise right as this already had max Red and Green to make that pure yellow); likewise the white swatch is still white as it was already maxed out on all colour channels. The blue swatch is now also white: it contained max blue and zero Red and Zero green. By adding in the missing colours, it became white. However the interesting bit is the black surround: this is now also yellow and it’s the best demonstration of actually adding yellow to your image. In the black areas, there was nothing in either Red, Green or Blue
To round this off, I’ve added a 50% grey swatch (R, G and B set to 128 – halfway between 0 and the maximum 255), as real images will have brightness levels other than zero or maximum throughout. All channels reset on the curves layer.
Notice there’s now an additional column in the centre of the histogram. This represents the grey pixels. Let’s take the blue out of the image:-
The grey is now also yellow, because it had Red and Green in it already. It’s not as bright as the Red and Green are not at maximum – they are unchanged at 128. Now lets reset the blue channel and then drag it up in the centre:-
The grey now looks more blue. It’s not pure blue though, as it still has 50% Red and 50% Green in the mix. It’s overall luminosity s higher than the blue swatch, which only contains max blue, but zero red and green. The other swatches are not affected as the curve has gone up pretty much everywhere except for the point which already has zero blue – on the far left. That point is still anchored to the bottom left of the panel. So nowhere on the image that had zero blue is affected. Likewise, the point for areas that already had max blue at the top-right of the curve has not moved: it’s still at the top and so the blue swatch is still pure blue.
So what does this mean for real photos? Here’s a selection of images with a curves adjustment that isn’t doing anything:-
First lets drag the blue channel down in the centre:-
Now – they look more yellow right? However this is because the yellow (red and green) was already there. I’ve dialled down the blue across the range except for Zero and Maximum brightness areas in the blue channel. The overall brightness of the image has reduced (remember nothing has been added, only taken away).
Now let’s actually add yellow instead by increasing the red and green channels (and resetting the blue):-
Note – I’m not saying this looks better! You can see the green channel curve in the properties box. I’ve done the same to the red channel. There is now more red and green in the image, and the overall luminosity has increased. We have added yellow. Now, doing either (removing blue or adding red and green) is perfectly fine and both will make most images look more yellow as long as there is yellow in there to begin with, however you can’t make yellow magically appear where there is none by taking out blue. Which approach you take will depend on the makeup of the original image and the desired effect (adding or subtracting luminosity).


