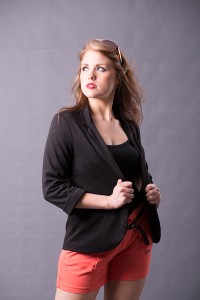
Or “early man” fashion shots really. These are pretty basic in terms of creative input, however I wanted to give the basics a go in terms of more even, full length lighting, and getting the background right! It sounds simple doesn’t it: just blur the background to even out the inevitable wrinkles in your seamless paper or vinyl? I tried a number of ways of doing this: brushing on -100 clarity in Lightroom with the adjustment brush using the “auto mask” feature. I tried feathering the brush, not feathering the brush; cleaning the edges after with the eraser. I got close, however at 100%, there was always a perceptible halo round the model. I tried blurring in Photoshop and masking the model by brushing the mask on; and a 100 variations.
Then I watched Frank Doorhof’s video on how he processes his fashion shots – ( On Kelby Training – go there now! You’ll like it ). I’d watched Frank’s great lighting videos, but never his Photoshop ones as, well, they have Matt Kosklowski’s tutorials on there – why would I watch Photoshop tips from Frank ? He’s the lighting guy!) However, Frank’s technique for blurring out the background really works, and it’s not even that tedious to do!
In a nutshell: Duplicate the image; on the duplicate layer, select the background using the tool of your choice (I used the magic wand).

Keep clicking until most of the background is selected, but don’t pay any attention to small areas caused by loops of hair and don’t worry about getting the selection perfect. Invert the selection. Expand the selection by 1-2 pixels so now you have a rough selection of your model with a small margin around them. Cut out the selection (your model). You can still see the model from the layer below. Blur the duplicate layer at maximum Gaussian blur. Get rid of the banding this produces by adding the same amount of noise to this layer as your camera produces (for my Nikon D800E, this is around 1% at ISO 100).

Paste the model back. This produces a 3rd layer: merge down. Now zoom in to 100% and click the duplicate layer on and off and marvel at the seamless join. You can then mask off the blurred layer to suit, say on shadows cast on the floor or for any fine tuning around the hair etc. Full size in the People gallery as usual.
Apart from that, these shots used a 1.2metre white octabox, with both baffles in place up high to camera left, and a gridded strip box pretty much opposite the octa to camera right and behind the model. The background is a grey seamless vinyl, not specifically lit.
Model: Ellie Anderson – Body Couture Agency. Clothes and make-up by Ellie.