…and this one’s for Jeff from Minnesota ![]() Hope the rest of your trip was as fantastic as ours.
Hope the rest of your trip was as fantastic as ours.
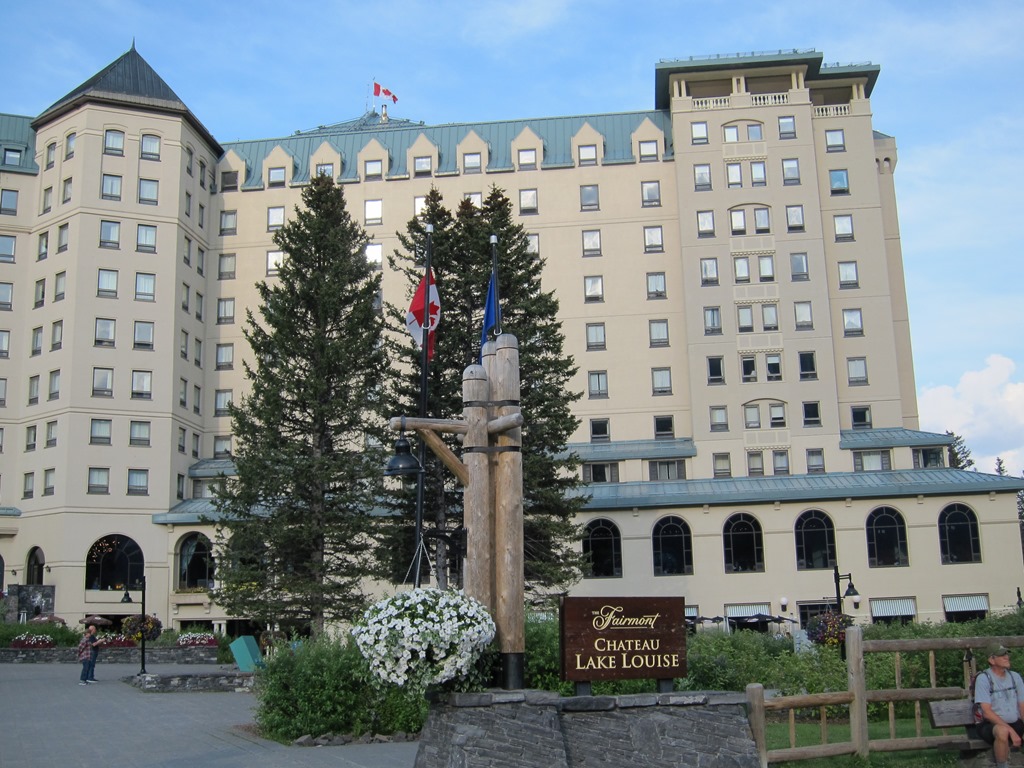
This was probably the most up market hotel we stayed in during our trip – the Fairmont “Chateau”. It looked more like Castle Colditz to me tbh, or an NCP car park with glazing – see below. Very nice  inside, but I somehow doubt the designers had seen too many French Chateaux…
It also had the north-east shore of the lake inside the hotel grounds, and although I had no idea at the time, it was best opportunity I had to put some real effort into a landscape shot. I mean – if the lake is right outside your hotel, there’s no excuse really…
We only had one night at the Fairmont and arrived early in the evening having spent most of the afternoon at Moraine Lake. We dropped the bags and went down to the lake. There’s a slipway in the middle of the lake shore that faces the back of the hotel, and this pretty much aligns with the view down the entire length of the lake. I wanted some foreground though, and I didn’t want to to park myself in everyone’s way either, so I climbed out onto the large round boulders to the right of the slipway. The first task is to work out the focal length, and position of the camera. I usually start with the 28-300mm super-zoom on the camera, and look for frames in the distance at the long end and wind it back in to 28mm and look for horizontal and vertical frames with foreground. I did know pretty much what shot I was going to take of this though, having done this wide-angle-see-through-foreground-water technique a few times and I knew this was a job for the Nikon 14-24mm f/2.8
So I switched to the 14-24mm and played around with the height and angle to get the best reflections and view through the water. About 3 feet high seemed right and I then set about getting the tripod set up. Pull out the bottom sections first, as you wont be able to reach those clamps once they’re down in the water. Adjust each leg to rest on something solid and with the tripod leaning back a little towards you. The temptation (because the tripod has a spirit level on it) is to try and make it level. I like it leaning back a bit as once the 2kg lens and camera are perched on it, it’s a bit front heavy, and I’d rather it fell over backwards on me, than forwards into the lake….
Then focusing: I measured the distance to the nearest rocks in the frame, used OptimumCS Pro to calculate the aperture and focusing distance. Found a rock that distance away and used the AF to focus on that. Locked the focus by switching the lens to manual focus and recomposed the shot.
Incidentally, I did try a 10 stop ND filter on the evening shot, to smooth out the water, however the actual result of putting a 10 stop filter on the Nikon 14-24mm lens using the Lee SW150 holder (and bear in mind that this filter only goes in this mount, and this mount is designed only for this lens) can be seen to the right – I got a nice picture of the inside of my lens. This happens because the light coming through the filter is reduced by 10 stops (1024 times less than “normal”) while the light reflecting off the back of the filter and into the lens (there’s a 5mm gap) is reduced by only 1 stop or so due to polarisation. I’ll need to come up with some sort of filler to block out the light between the rear baffle and the filter.
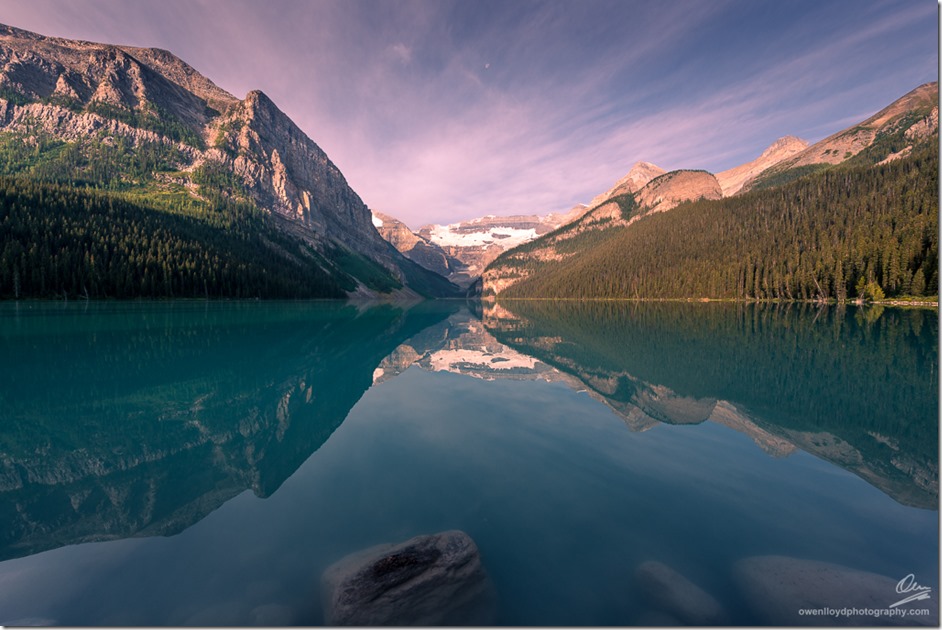
That just leaves exposure! As the sun would still be quite high by the time it got to the mountain ridge in the distance, it would by strong so some filters were called for. I used the Lee 2 stop hard grad and bracketed the exposure around 2 stops down from “normal”. In the end, I used just one file to make the image above – there so much dynamic range off the edges of the histogram in the D800 raw files. This is done in Lightroom using the adjustment brushes to dial various zones up and down and add contrast here and there to bring out the sparkle on the water. I did edit this shot in Photoshop to remove the of the bigger flare artefacts in the foreground. I left the smaller ones as they add to the feel of the image.
As the sun made it’s way around to the right of the scene, the clouds came and went, and it never got any better than this one. Of course, the “golden hour” of really low, soft yellow light would not be visible from this location as the sun has effectively “set” behind the ridge while still quite high in the sky. Looking around though, and checking my sun compass app I figured out roughly where the sun would start illuminating the trees and mountains in the morning. At about 7:30 am, about an hour after dawn, it would be around 10 degrees up and that looked to be high enough to start lighting the trees on the left, and some of the distant snow capped peaks in the centre.
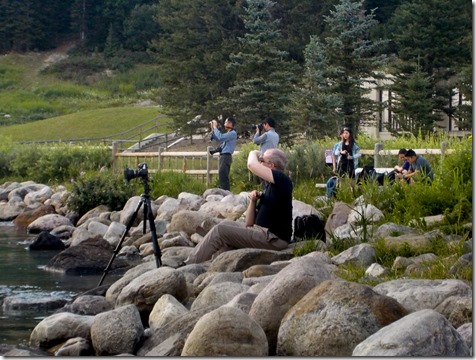
 I rolled out of bed at 7:00 and came back to the same perch on the rocks. Despite the early (ish) hour, the population of a small Chinese village gathered behind me. There was much interest in my old school filters and the woman in black eventually approached to ask what they were for. She seemed to be the only one of her group that spoke any English ( and I speak no Cantonese, Mandarin or Hakar..) and yet I had a good discussion with the entire group about exposure via her as translator 🙂

 Got some great light on the trees and some very effective side-light on the rocks on the left of the image. As the sun climbed higher, the centre peaks lit up too and I took this frame. The contrast was low enough to discard the filters, and this, like all of the images on this page, is one exposure. No blending, or tone mapping required, such is the dynamic range of the sensor in the Nikon D800E. I then decided to make more of a feature of the foreground rocks and went for a vertical shot, with the camera pointed more down into the rocks to reduce the reflection of the surface of the water and so allow more of the underwater scene to show through. I needed to edit this one in Photoshop to remove the shadow of my tripod legs. Then one with a rock poking up out of the water. A fantastic view in a very convenient location, and I can heartily recommend the Fairmont hotel as well, great restaurants, service and location. Next, we sample accommodation at the other end of the scale – a Best Western motel in Jasper 🙂


Hi Owen,
Really nice read, this hotel has as good a location / view as the appropriately named View Hotel in Monument Valley where we stayed on our trip last Sept (2013). You mentioned cloning out some flair (and leaving some in for artistic effect) so I thought I’d share a tip I read recently regarding the removal of flare. You’re an intelligent guy so probably already know but I’ll tell you just in case you don’t, when I read it I wanted to slap myself as it’s so obvious once you know. With your camera on a tripod take your shot as normal then one with the same exposure but use a finger or thumb to cover the sun and thus eliminate said flare then use that shot on a layer with mask to paint in the non flare bit over the flare. Why didn’t I think of that? It works a treat.
Cheers,
Phil.
Hi Phil – yes I have done this in the past and I even did it to a few of the frames at this location, however, when you’re shooting multiple bracketed frames, and the camera is way out in front in the water, it just starts to get a bit hit and miss as I couldn’t really look through the viewfinder to see where my thumb was. More often than not I was either not blocking the sun or getting my entire arm in the shot 🙂 So I gave up on that pretty quickly – it’s pretty easy these days to remove these things in post – either using the opposite colour on a brush in Lightroom, or deleting it in Photoshop. The thumb technique is better if you can reach the viewfinder to do it though 🙂