Up until recently I had been processing most portraits in Portrait Pro Studio. Portrait Pro does a great job for 80% of the retouching work – especially on hair and skin as long as you don’t go too wild with the sliders. However, one of the things I don’t like about it is the way it handles exposure and contrast of the image generally – I can never get beauty style shots light enough and so always end up applying a custom preset to the resulting tiff files in Lightroom afterwards. It doesn’t do a great job on the eye sharpening or iris contrast either, so I started applying fairly blunt adjustment brushes to the eye area in LR too. Having read Scott Kelby’s “Light it, Shoot it, Retouch it” (which is excellent by the way) I’d played around in Photoshop replicating Scott’s approach with great success – however, I don’t like to use external editors such as Photoshop or Portrait Pro if I can avoid it as this generates manual steps in my workflow and intermediate tiff files.
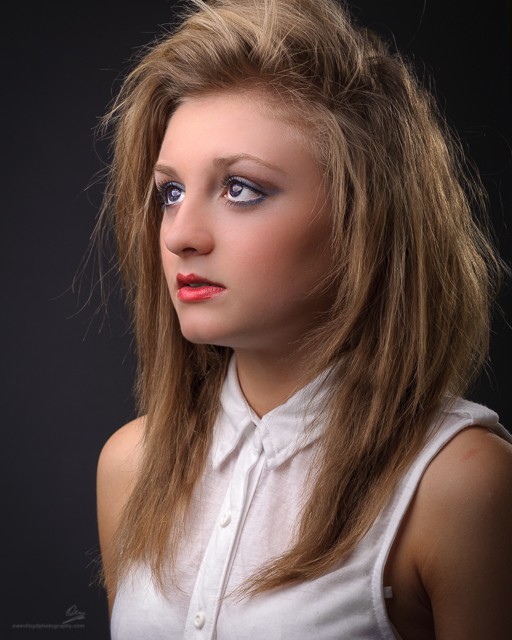
On the last shoot I did, I thought I would try to process some of them purely in Lightroom, translating the techniques Scott uses in Photoshop. Here’s what I did to the image on the left:-
Most of the work is done with the adjustment brush. However I started by making global adjustments to blacks, whites, shadows and contrast and then using the healing tool to remove obvious blemishes.
I then created a series of brush presets that I could use going forward:-
- -90% clarity – applied with a broad brush with no auto-mask to the skin to soften it.
- Increase exposure and highlights, reduce saturation on the whites of the eyes, with a small increase in white balance to compensate for the de-saturation.
- Increase contrast, saturation, clarity and exposure on the iris and pupil only. Apply with auto-mask and no feathering
- Apply generally over the eye area: increase sharpness, clarity and contrast with small uplift in exposure (0.19)
- Increase in saturation, slight decrease in exposure to lips. Sometimes I’ll add a tint to this. Apply middle without auto-mask or feathering. Apply up to edges with auto-mask and no feathering
- Big brush over hair area, increasing highlights, small decrease in sharpness and clarity and playing around with vibrancy, tints etc
 A final crop and I’m done. I really like the clean result this gives. The downside is that Lightroom really starts to creak under the weight of all the brushes, and healing clicks and collapses occasionally requiring a restart. More memory would most likely cure this though as my current OS can only address 4Gb.
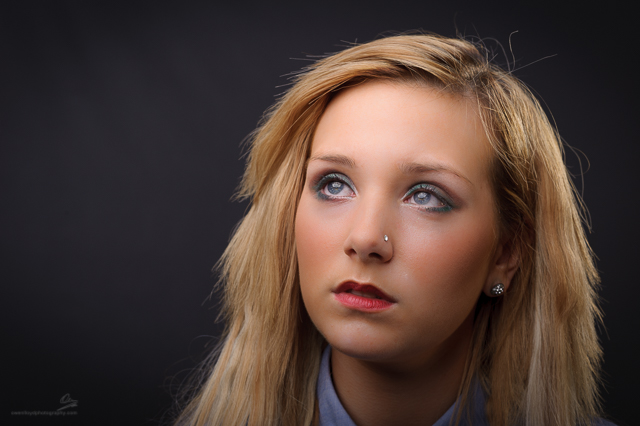
I have also created presets for toning the image, used on the image to the right which was processed in Portrait Pro and then finished in Lightroom. This was a revelation to me when I read it somewhere, a while back: using the split toning tool in Lightroom to tone the highlights and shadows instantly gives your high key beauty style shots a print magazine style. Use the yellow preset colours for the highlights and the blue preset colours for the shadows – and then adjust using the sliders on the split toning tool.
On the whole, you can get very good results purely in Lightroom up to a fairly advanced state of re-touch. Where it’s not so good, is in actually editing pixels. Anything more complex than a simple skin blemish heal and it will struggle. You are better off doing these in Photoshop: the clone stamp and healing brush tools are far batter for removing stray hairs. Of course you can also make other adjustments in Photoshop such as adding hair, altering the shape of the face with the pinch and liquefy tools and so on. What I like about working purely in Lightroom though, is that at any time, I can branch off a virtual copy to try something out, and the catalogue manages all the various versions. Sure, you can create copies of images in Photoshop, however it’s not as slickly managed. I can also then sync the global adjustments to all of the shots from that set and then get to work with the brushes again…..

See the images full size in the People gallery

Pingback: Portrait shooting and processing session | Holmes Chapel Camera Club