Ah um so this is another one the great wizard of photons – Mr Joe McNally casually did one afternoon (well that’s what it seemed like when it was edited together with a load of other shots in a Kelby Training video) and I just thought “oh yeah – I could do that” followed by “ah but…” and then “unless you…” and finally “I could do that”.

I’m talking about mixing ambient light with flash in a selective way – either outside, or using continuous lights. Normally, in the studio, I would start off by confirming I’d banished the ambient light so this was going to be interesting. Joe has a phenomenal shot in his portfolio shot in Beijing of a woman in traditional looking Chinese garb with lots of flowing patterned silks streaming out behind her in the wind. As it moves away from her, the fabric becomes more and more blurred from motion. Joe made this happen by lighting only the front of the model with flash, and adjusting the shutter speed to dial in the required amount of blur on the trailing silks that were hidden from the flash light.
I did the shot above at Hallam Mill studio in a cove. It’s a bit ramshackle to be brutally honest, which meant hours of cloning and filling to remove seams, fix variations in colour and so on, however it did the job and Jim, the studio owner is a fantastic host – conjuring all manner of things from the depths of the massive studio, set on almost all of one floor of a gigantic old mill in Stockport. The basic ingredients are:-
- One cove.
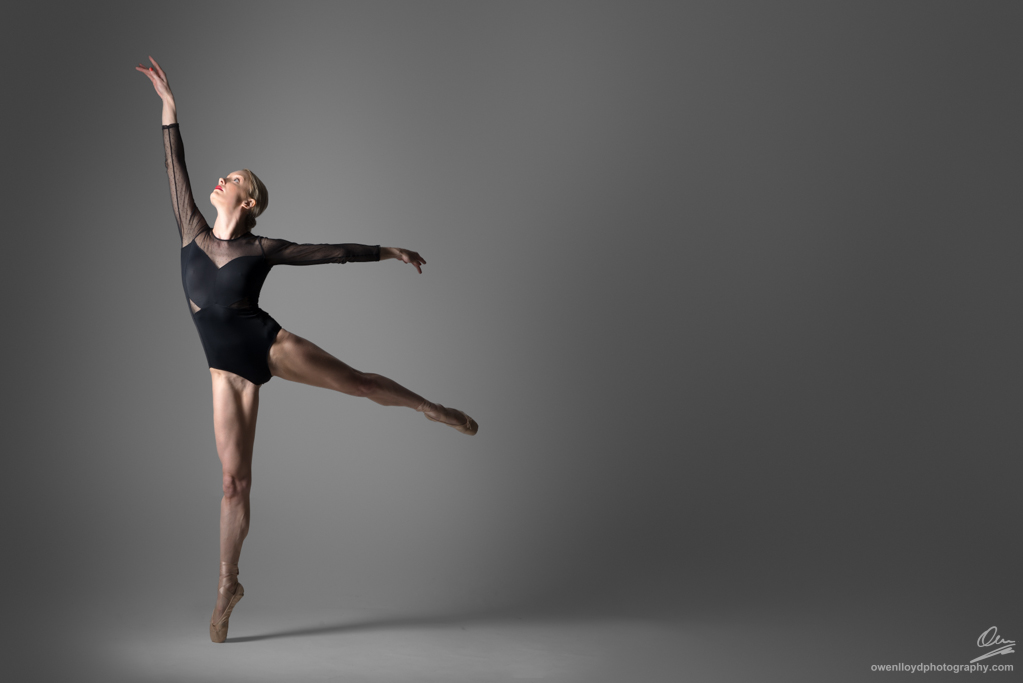
- One incredibly muscular, toned and skilled dancer – Katy C
- 5 metres of satin(esque) shiny fabric
- Some wind
- One strobe
- One or 2 red-head or other powerful continuous lights with tight beams (use barn doors, snoot or cinefoil)
- A large sturdy stepladder – Jim provided us with what can only be described as a platform on wheels – stepladder doesn’t really cover it 🙂
- 2 x assistants to throw the fabric and operate the wind – Lorraine Barnard and Katie Sutton – to whom I’m eternally grateful for helping make this shot a reality
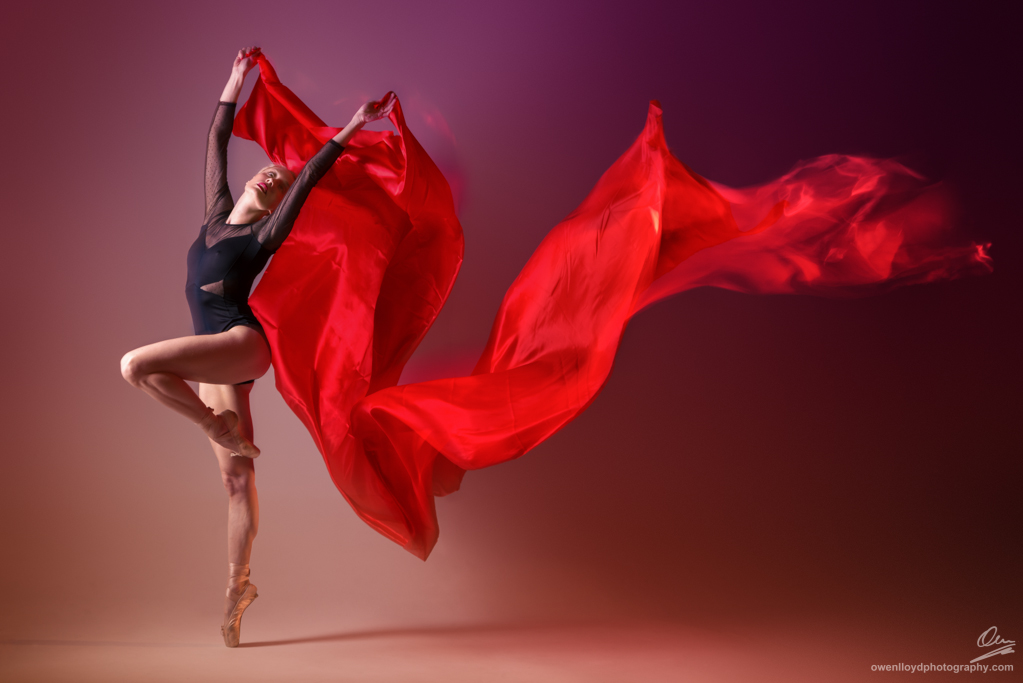
The basic idea is we would light the fabric with the red-heads and Katy with the flash. Prevent Katy from being lit with the red-heads and she should remain dominated by the flash light and so render sharp on the image. The fabric, meanwhile would be propelled from the top of the stepladder into the scene where it would be lit continuously for the 1/8th duration of the exposure and fall through the frame, twisting and turning in the wind generated by 2 fans – one large general fan, and a directional hand held one to give it some ripple and a bit of lift.
Ok then. As Dr. Pepper says – what could go wrong?
The first problem was getting a viewpoint for the camera. Old mills are fantastic spaces, however they do come with a repetitive problem: iron pillars. I opted for camera in front of the pillars at a fairly wide (65mm) angle. The next thing to do was dial in the main flash light that would light Katy from the front. Here’s a sighting shot from that set-up – pretty good, and a reminder to do some of these more simple shots in the future – just one softbox.
Next up was adding the fabric. I had about 5 different colours of 2 tone organza voile and some satin-like stuff in 3 colours, 5 metres of each. Now, Frank Doorhof calls the red organza “fire cloth” – and for good reason too: light this stuff up from behind and it really comes alive. So I had Katy hold one end of the red organza and Lorraine held up the other end and we did some test shots….


 Well – I guess back/side lighting organza doesn’t work then.. We got a bit of a sheen off of it, however this wasn’t going to deliver what I had in mind. We brought out the red satin and gave that a go…

Oh yes – now this is more like it. I realise now I should have ironed this sucker – the organza’s don’t really show creases, but this stuff looks like it was stored in a printing press. More work in Photoshop… Next – bringing it all together with wind, fabric movement, and the witches brew of light. Lorraine went up on the platform, with a bundle of fabric whilst Katy held on to the other end. Katie S was at the other end of the set in front of Katy C directing air from 2 fans to try and keep the fabric aloft a bit longer and also ripple it a bit to try and get the right frequency of movement along the whole length of it, rather than just the end falling into shot.
The main problem was keeping the ambient off of Katy.. If it hit her, she would also be blurred. We angled off the red-head lights towards the background, and also used the barn doors on the lights to make sure the shadow these generated ended before Katy. Even with all of this, in a studio with white walls and a shutter speed of 1/8th at f/8, it was luck that gave us the picture. Essentially, if the fabric blocked the continuous light from hitting Katy, we were fine. If not: Ghost Central. If I was doing this again, I’d bring some cinefoil for the continuous red-head lights – barn doors just don’t quite make it in terms of getting a tight controlled beam of light. From then on, it was just a question of numbers. We actually got the shot I used for the top image quite early on – about number 6 I think, however we shot around 85 frames. I reversed the set halfway and Katy faced to the right instead. I did this for a couple of reasons – Katy was moving towards a wall – the end of the cove which meant she had to pull up, which didn’t help the flow of the positions she was taking. Also, light from the red-heads was bouncing back off this white wall and onto Katy. There is 15 foot of clear space on the other end of the cove, so Katy could move into that and out of shot – and the stray light could get lost in it too.
I felt confident we had some usable frames at this point so decided to have some fun with the fabrics and bring out the fog machine. I love fog – and it masks out the messy background too saving hours of clean-up 🙂 I strung up 2 organzas, one on each side of Katy on some cord from the light fittings that dropped on chains from the ceiling of the old mill. Thought about getting a third in directly above Katy but there was nothing to suspend it from and we didn’t have the time to construct something, so we went with 2. Great input from everyone on the set on this colour choice, lighting and what type of potatoes are best for using in a slow cooker. Here’s Lorraine: “you have lipstick on your chin luv”, and Katie S extolling the virtues of King Edwards over Pipers and the finer points of slow cooking..


…and then demonstrating how to eat it. Not sure Katy C is convinced :). Whilst Lorraine, Katie and Katy work out the poses and fabric positions, I was sorting the back-light. Back-lighting fog is the way to go for this, however it does restrict the positions Katy can use as the light must be mostly obscured by her for the shot to work.
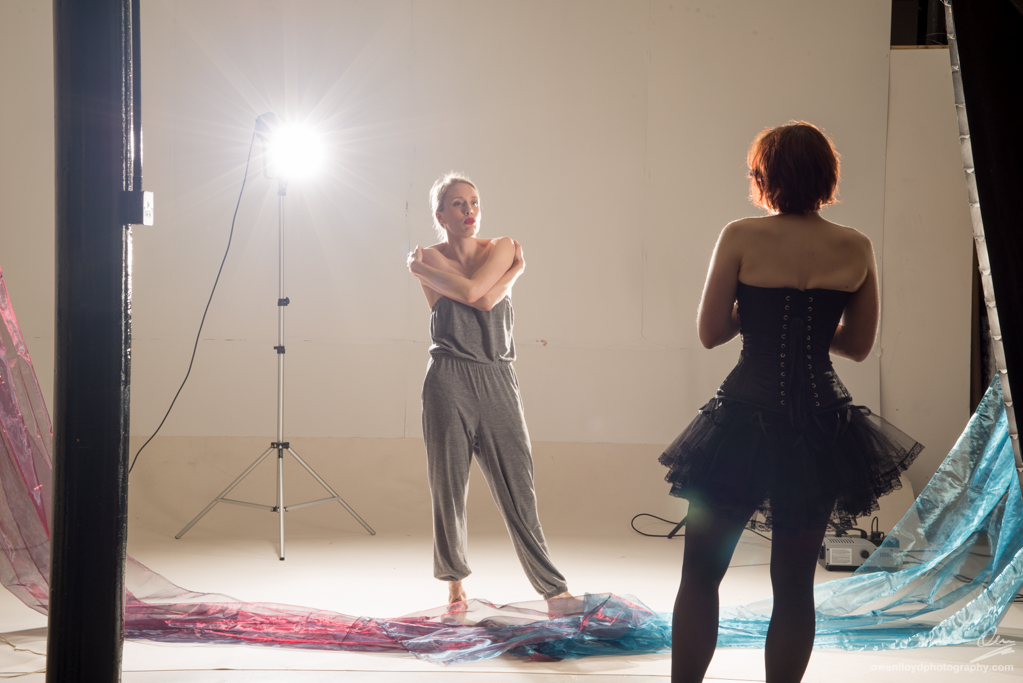
We then shot some using the lighting you see here without fog, 2 lights off to the rear, left and right providing edge lighting. These worked ok, but were blown into the weeds by the backlit fog we did after. You can see one of the many pillars that make up the structure of the old building on the left. If you’re wondering btw, why Katie S is dressed like a gothic tooth fairy, it’s because as well as assisting me on this shoot, we would then work together on a shoot afterwards. More to come on that one, which produced some amazing results.
Final result from this set-up below.

Processing these images is mostly about clean-up. As you can see from the unprocessed (ie unprocessed apart from conversion from a raw file into a colour space, applying a white balance and default Lightroom profile etc – actually quite a lot of processing, but nothing done by me) images above, the cove at Hallam is a bit ramshackle, and cream in colour. I use content aware fill to delete the big chunks at the edges of the frame, and then a combination of healing brush and clone stamp tool and the patch tool to remove the rest. I use the quick select tool to put selections around areas of the cove I need to work on where they come up against the fabric or Katy – and then use the clone stamp tool to remove a small part where they meet. Using a selection in this way means you cannot clone stamp over parts outside the selection – and so the figure/fabric is protected. Seams showing through the fabric need healing, however the satin is quite opaque so this wasn’t a problem for this image. Then to complete the clean-up and duplicate the layer, make a selection of Katy and the fabric using the quick select tool, use refine edge to make the selection as good as I can get it, and then cut out the figure and the fabric from the duplicate layer. I then blur what’s left at around 250% Gaussian blur, then add 1% monochromatic noise to remove the banding that happens when you blur. Pasting the figure/fabric back in then gives me a layer with super smooth background and sharp figure. I don’t want this everywhere though – I need to preserve the shadows on the floor or it looks like Katy is just pasted onto a blank background, so I mask off those parts by brushing black with a soft brush onto the layer’s mask.
Then, after sharpening (usually using smart sharpen on a new layer, adjust and mask to taste etc it;s back to Lightroom. I do my final adjustments in Lightroom such as tinting, localised exposure and colour adjustments as it’s just so much quicker working with the auto mask brush, radial tool and grads. Finally, I usually have a play with the Google Efex (Nik) tools and produced this one from Colour Efex 4.
You may just be wondering, if you’ve read this blog before why my assistants are almost always female. Well, some of it is just coincidence. I happen to know a lot of female photographers; they tend to be more interested in this style then many of the male photographers I know, however it is also partly deliberate: for shoots like this where the model or dancer is working in minimal (or no) clothing, I do think this provides a more comfortable atmosphere than a bunch of guys on set, so I am careful about who I ask to assist on these shots. Also, women have a different perspective and interpretation of the shot – and I’m grateful for the input I got from both Katie and Lorraine on the day. Lorraine and Katie are both very skilled photographers themselves and and I get a lot of inspiration from talking to them on the set. Thanks to both of you for making this shot happen, and of course to Katy Pectin for starring in it, and to Jim Gormley at Hallam Mill for accommodating all of our requests. Hallam Mill is a wonderful place to shoot – absolutely stuffed with props and sets.
Owen
Pingback: Mixing Flash and Ambient | Holmes Chapel Camera Club